Focaccia Bread - Grain Free

Making depressions in the dough for the salt water

First I need to give credit where credit is due. Jennifer Robins from Predominately Paleo originally posted this bread dough as Challah bread on her Facebook post. I was having a moment that day and needed bread. It was kismet. I’ve experimented with grain-free breads for some time now, and they’re mostly quick breads (leavener, not yeast) and the response has been rather critical (I’m referring to my family). I wanted that yeasty flavor and stretchy gluten texture that, alas, only wheat flour can yield. This comes really close. I’ve adapted it a bit from the original, because I prefer the flavor of honey to maple syrup, and added a bit of extra oil to compensate for the liquid. (Baking math). But Jennifer totally inspired this, and it gave me the chance to go old school with some bread techniques, back to my days baking in Cleveland!

Since discovering this recipe, I have found so many ways to use it. Bake as a round loaf for a sandwich, use as pizza crust, or fill and bake for Stromboli. Let me know in the comments if you try any of these options! I love to hear your feedback.


Caramelized onions are optional but give this focaccia it’s unique flavor.

The ingredients are a little bit of an investment, but if you’re already cooking with grain-free ingredients, you probably have most of them. I buy the dried instant yeast in a jar. It keeps forever in the refrigerator if you keep the lid tightly sealed. Due to our sub-tropical climate, cake yeast is not available in Florida. Too humid. If you prefer it, make the proper adjustments. If you “proof” the yeast (aka making a sponge) while you’re getting all of the other ingredients together, it will come to life in the warm water and will be bubbling effervescently before you know it. Adding a sprinkle of tapioca flour gives the yeast a little food to munch on.

When I was the assistant pastry chef at one of my first restaurant jobs, I got to make the bread every Wednesday. I picked up a few methods that are tried-and-true when it comes to bread making, and I apply those techniques to these ingredients. (Remember, learn techniques, don’t memorize ingredients. Thanks Chef Ron.) Also like most fresh-baked breads, it only lasts one day. This is not a recipe I recommend making extra and keeping around. It doesn’t last. That being said, if you do find you have leftovers, cube it up, toss it with some olive oil and bake until dry for croutons. (Just like real bread.)

Finally, the addition of caramelized onions comes from those old baking days. This is how we made it back in the day to serve in the dining room. You don’t have to add them, but don’t skip the salt water. It develops the crust and adds a dried salted finish, which is what makes it most like the traditional focaccia. It also makes a delicious base for pizza. I think you can fool those skeptics in your house with this, as I did, so I call it another paleo win!


Use this dough to roll flat, fill with uncured meats and dairy-free shredded cheese, then roll up and bake for a classic Stromboli.


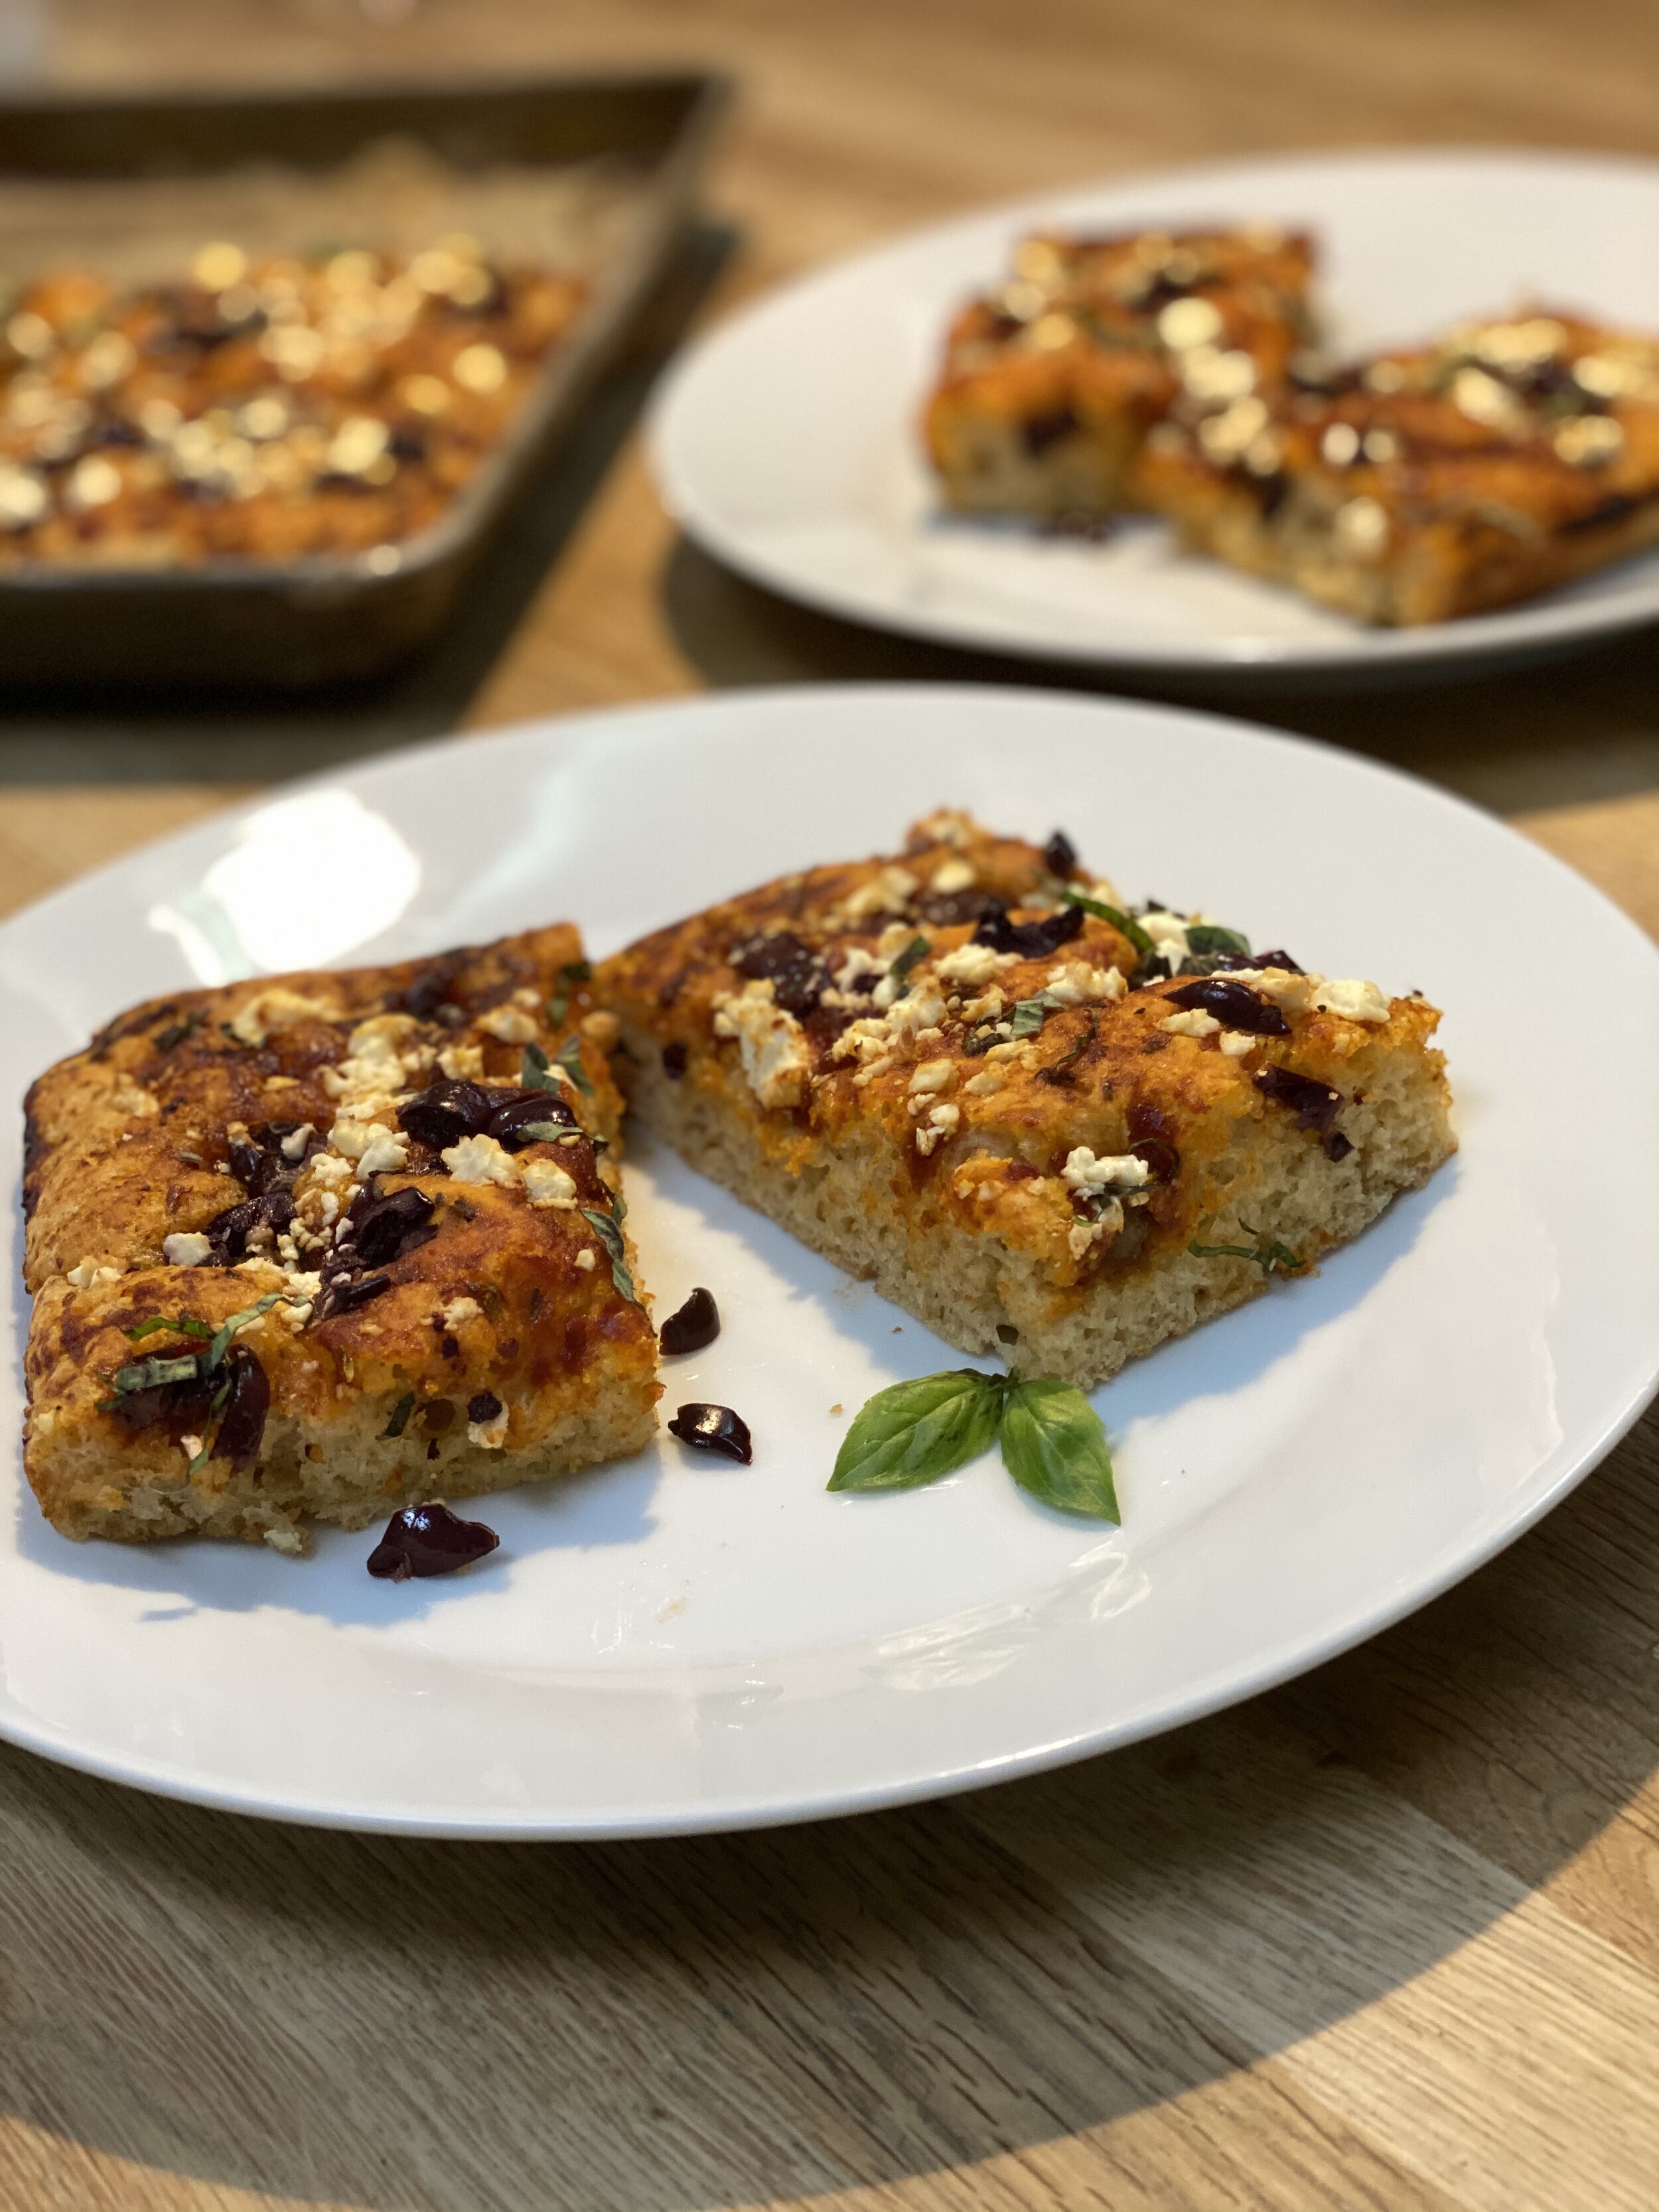
Foccacia topped with tomato, olives and feta , or try a cashew cheese for a non-dairy option.


To make this Cold-Press Picnic Sandwich, simply bake the dough in a 9 inch round cake pan, fitted with a piece of round parchment in the bottom of the pan and coated or sprayed with vegetable oil or ghee. Once cooled, slice, fill with your favorite sandwich fixins, wrap tight with plastic wrap and top the whole thing back into the cake pan. Add some weight to the top (a couple of cans work) and let it “press” overnight in the refrigerator.

Watch how I roll and fill the dough. Like and subscribe to my YouTube channel!

 
Yield: 8
Living Delish & Nutrish:
Focaccia Bread - grain free

Focaccia Bread - grain free

Prep time: 20 MinCook time: 45 MinInactive time: 1 H & 30 MTotal time: 2 H & 34 M

Ingredients

  • 1 1/4 cup tapioca starch
  • 1 cup potato starch
  • 1/4 cup psyllium husk
  • 1 teaspoon pink Himalayan sea salt or Maldon sea salt, plus 2 Tablespoons for topping
  • 1 Tablespoon apple cider vinegar
  • 1/4 cup olive oil
  • 3 eggs
  • 2 Tablespoon instant yeast
  • 1/2 cup water, about 110º F
  • 2 Tablespoons honey
  • 1/2 sweet or yellow onion, sliced thin
  • 2 Tablespoons ghee or olive oil for caramelizing onions

Method

  1. Combine all dry ingredients in the bowl of a stand mixer fitted with the paddle attachment.
  2. The dough will look like batter, a bit runny, so a dough hook attachment won't work here. If you don't have a stand mixer, mix by hand. An electric hand mixer will incorporate too much air into the dough.
  3. In a measuring cup or small bowl, make the Sponge by combining the warm water, honey and yeast. Stir gently to make certain all of the yeast is submerged. Sprinkle a little tapioca flour (no more than a teaspoon) which will help to activate the yeast. Set aside until it's foamy and bubbling.
  4. In a separate bowl combine the eggs, olive oil and vinegar. Beat slightly to break up the eggs.
  5. Add the egg mixture to the yeast sponge, then to the dry ingredients in the mixer bowl. Scrape the bowl to ensure all of the dry ingredients have been thoroughly combined with the wet. The more you stop and scrape the bowl, the smoother the dough will become. Note that the mixture will be thin, similar to pancake batter.
  6. Remove from the mixer and leave in the mixing bowl. Cover with top of the bowl with plastic wrap and allow to rise 30 minutes. Keep it in a warm spot, cover the entire bowl with a towel.
  7. Once the first rise is complete, turn the dough with your hands, just enough so it will collapse. It can remain in the same bowl as long as there is adequate space for it to almost double in size.
  8. Lightly spray the piece of plastic wrap with avocado oil spray, ghee spray or olive oil spray. Place the sprayed side over the dough so it's touching, but not so tight that the dough cannot continue to rise. This prevents the dough from forming a skin. Cover again with the towel and allow to rise for 60 minutes.
  9. During the second rise, caramelize the onions. Preheat a sauté pan or skillet with ghee or olive oil. Add the sliced onions and, on medium heat, stir occasionally until onions are wilted and golden brown, about 15 minutes. Set aside to cool slightly. (You can do a batch of these in advance and keep them in the refrigerator for topping almost anything!)
  10. When the 60 minutes is almost up, preheat the oven to 350ºF. Line a quarter sheet pan (about 9" X 12") with parchment paper and spray or brush with avocado, ghee or olive oil.
  11. Turn the dough out into the sheet pan and evenly spread to the edges of the pan, making sure to keep the thickness consistent from the center to the edges. Be sure not to over-work the dough.
  12. Using four fingers (no thumb) spread them about an inch apart and gently make rows of indentations into the top of the bread, making sure to not push all the way through to the pan. Just enough to make indentations. (If you do go through, it's ok)
  13. Mix the additional 2 Tablespoons of salt with 1/4 cup of water until dissolved. Brush generously over the entire top, and fill the indentations with the salt water. Top with caramelized onions, if using.
  14. Bake for 25 to 30 minutes, rotating the pan halfway through baking. Brush with additional olive oil and allow to cool before cutting.
Did you make this recipe?
Sharing is Caring! @livingdelishandnutrish on instagram and hashtag it #livingdelishandnutrish
Created using The Recipes Generator
 
Previous
Previous

Chicken with Blood Orange, Cucumber and Pistachios

Next
Next

Irish Soda Bread - Grain Free